Log, on the other hand, uses its pixel values much more efficiently. If a log image holds ten stops, then 0.0–0.1 is used for the darkest stop, 0.1–0.2 is for stop 2, 0.2–0.3 is for stop 3, and so on, up to 0.9–1.0 for stop 10. Each stop gets exactly the same amount of data fidelity.
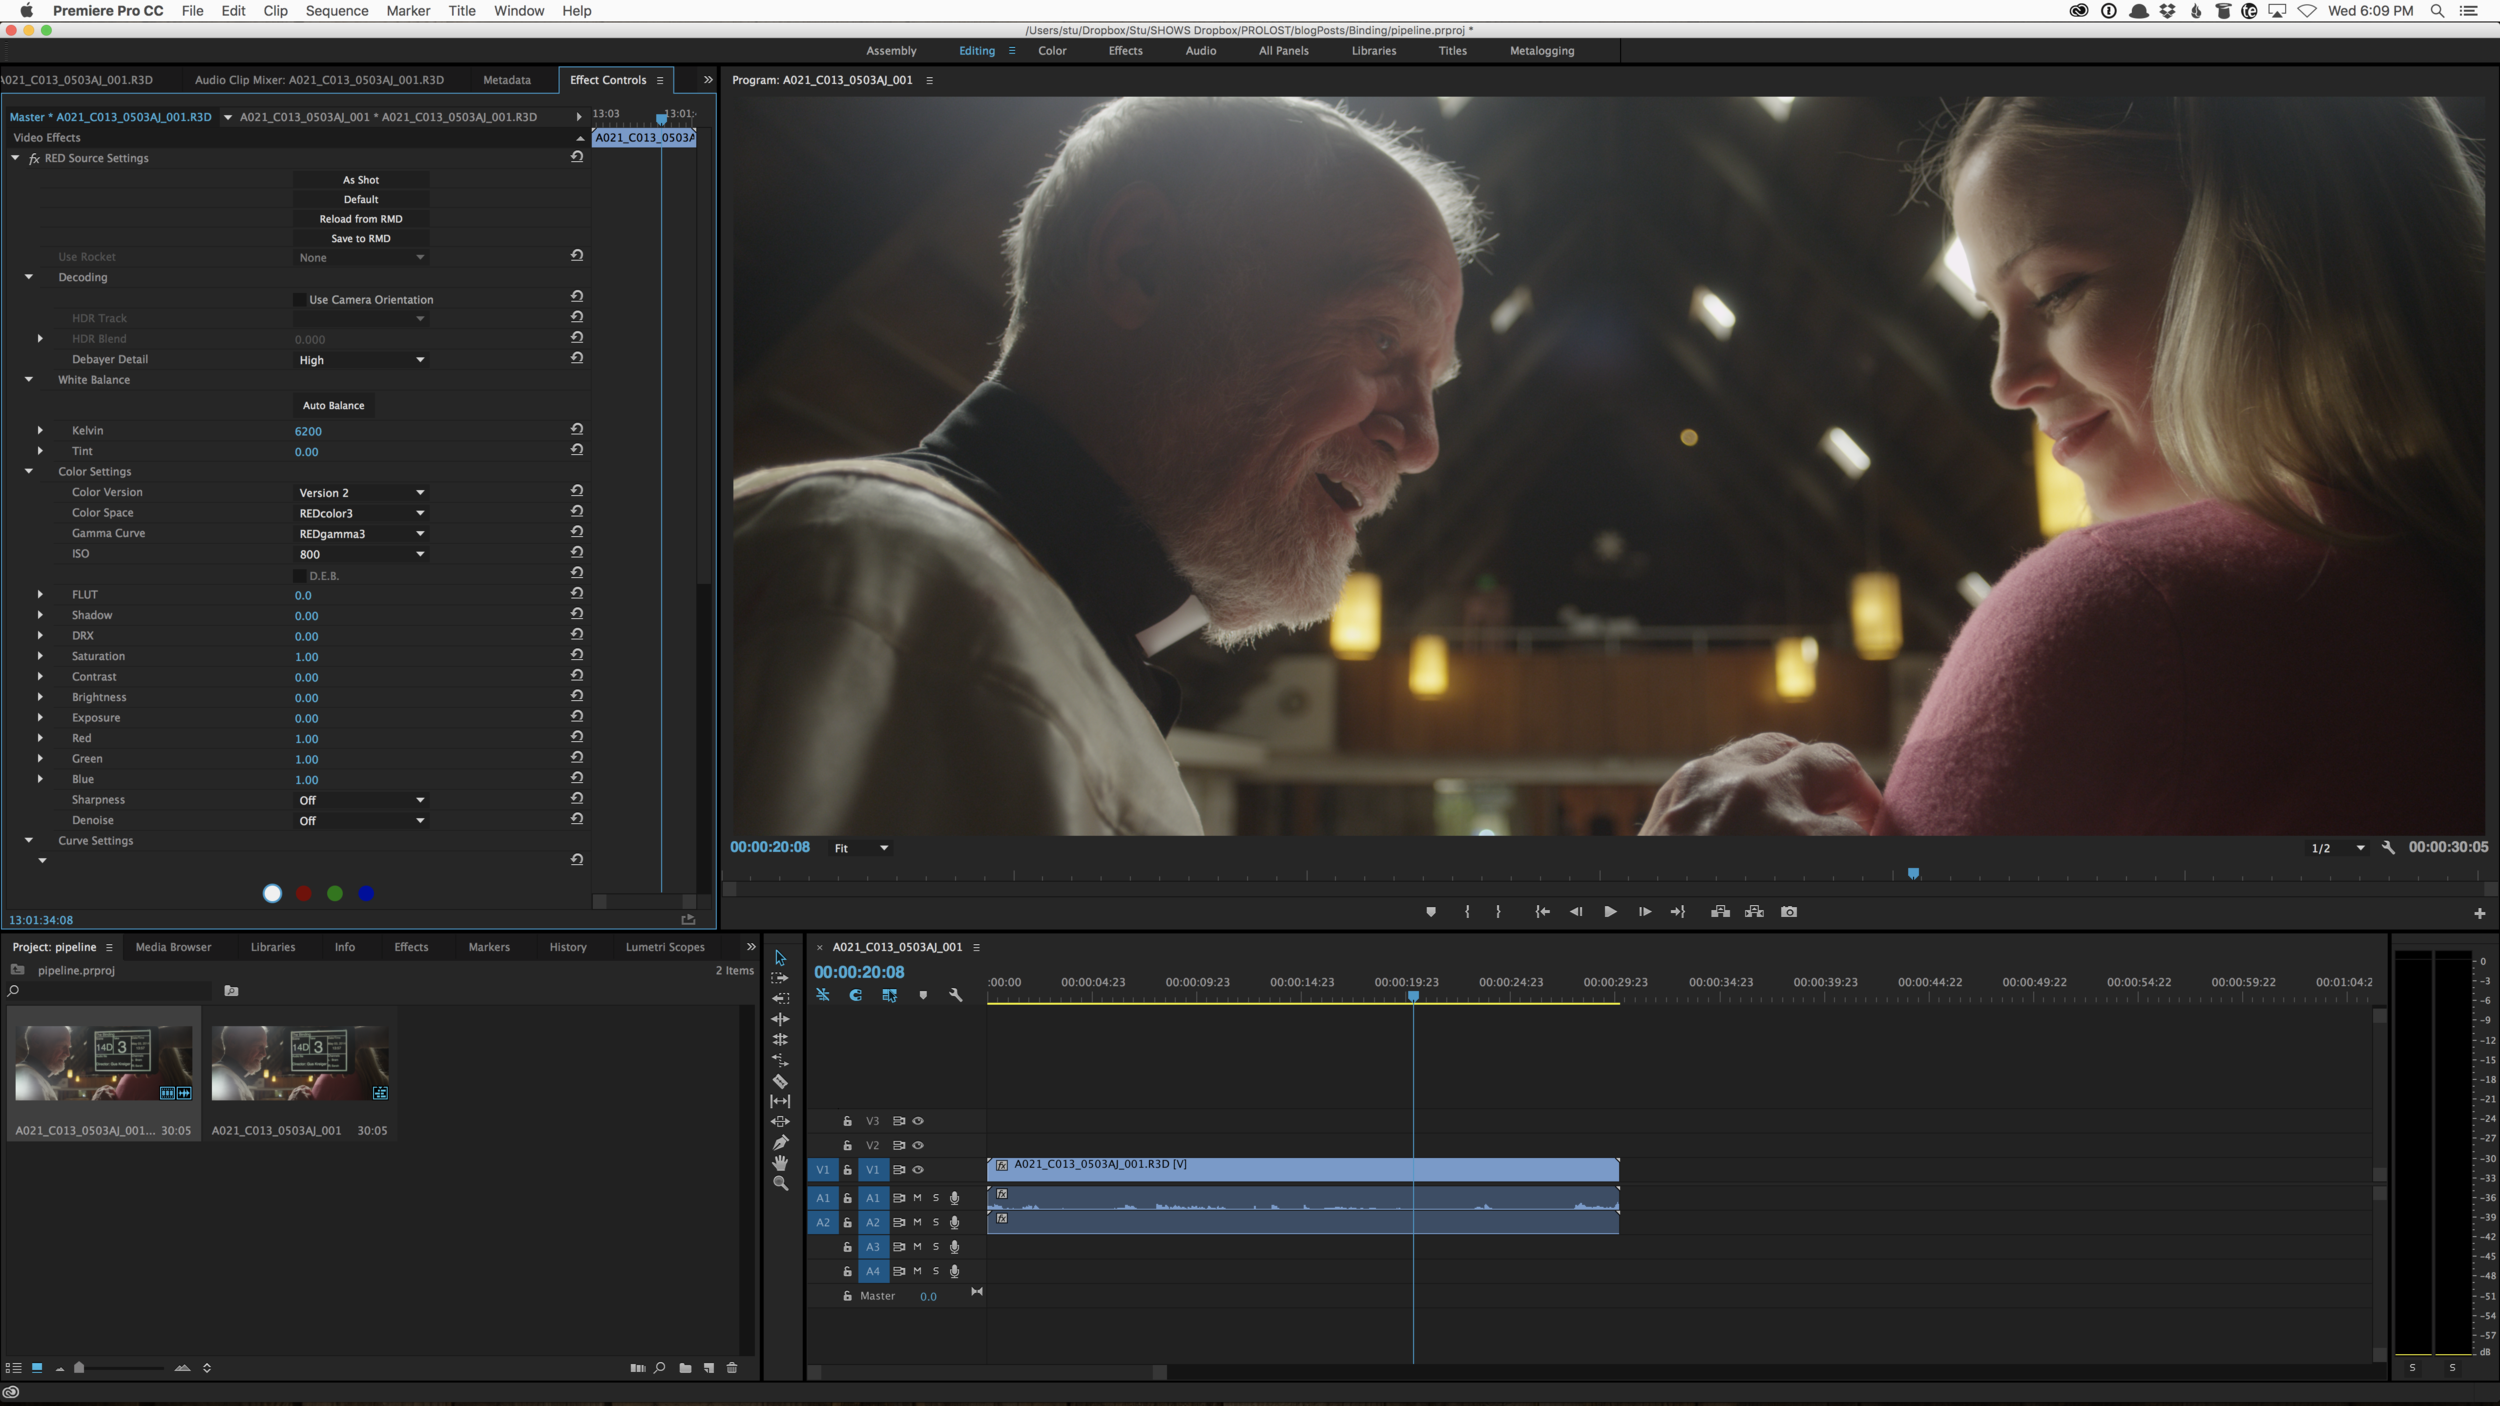
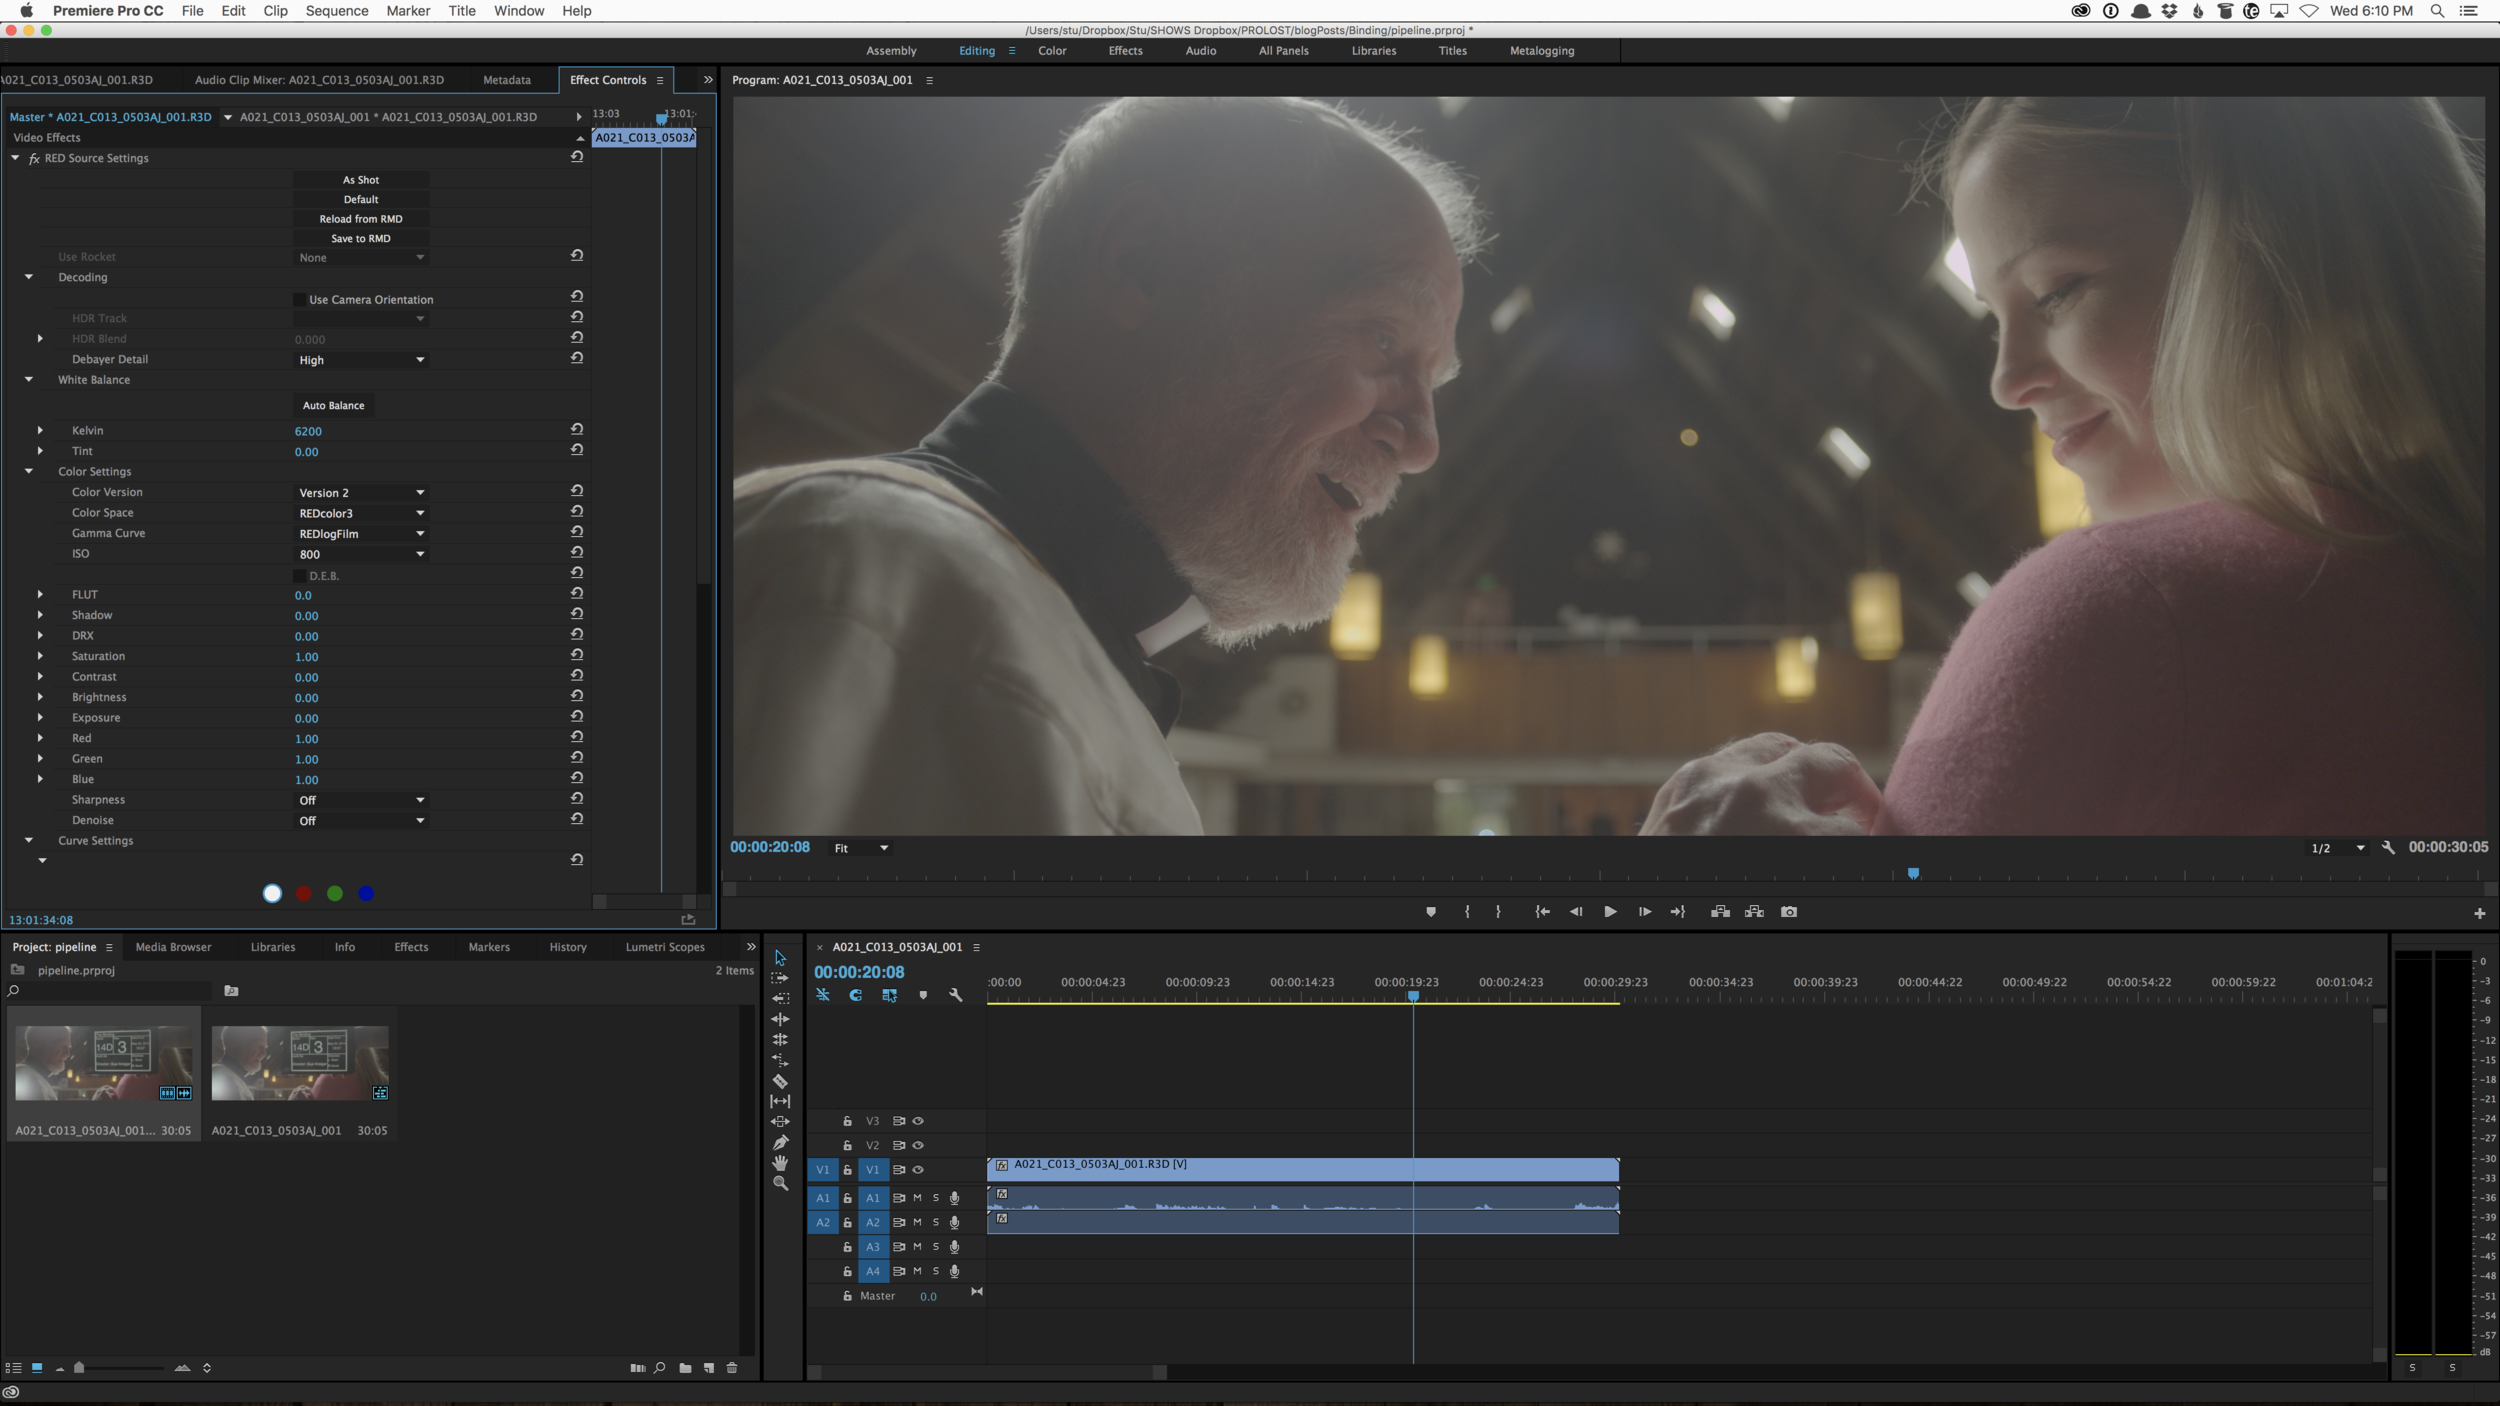
See what I mean about log being the flattest of the flat picture “styles" or “profiles”? When I created Prolost Flat, I was aiming for something as close to log as I could get.
In both log and linear images, color adjustments can easily be natural and organic, because the number-spaces so easily invite simple math to relate directly to light values.
- In a linear image, adjust exposure with multiplication. To brighten an image by one stop, multiply the values by 2. To darken an image by two stops, multiply the values by 0.25.
- In a log image, exposure is adjusted with addition/subtraction, which is sometimes called offset. To brighten an image by one stop, add one stop’s worth of values to the image. In our 10-stop example, that would be 0.1. So adding 0.1 the the pixel values bumps exposure up one stop. To reduce exposure by two stops, subtract 0.2.
When someone points out that raw images are eminently color-correctable, it’s worth remembering that the same is equally true of log. And since log images better utilize their data range, they don’t require as high a bit-depth to hold a high-fidelity image. A hypothetical 10-bit linear raw image has substantially less color fidelity where it counts than an all-other-factors-being-equal 10-bit log image.
Raw Pixels are Rapidly Reduced to Regular Pixels
One myth of raw processing is that it happens all at once. This is not true. Every raw processing engine has an order of operations. And very early in that order of operations is the debayering step, where the monochrome, color-filtered pixels are cleverly interpolated into unique RGB values per pixel.
After this operation is performed, the result is a set of very nice, high-bit-depth, linear-light RGB pixels. These pixels are no different than any other very nice RGB pixels. In fact, they’re somewhat challenged, since the debayering process isn’t perfect, so the RGB values may have aliasing and other undersampling artifacts.
All of the subsequent image processing in your raw software is done to these regular, non-magic, RGB pixels.
Some raw adjustments, like sharpening and other detail tweaks, may dig all the way back to the demosaicing stage in the pipeline. But that doesn't change the fact that the first step in the image processing pipeline is to make plain old RGB pixels out of the raw file.
What this means is that the vast majority of the “raw image processing” to which we ascribe so many magical powers, is just good, old fashioned RGB image processing — that could just as easily be done to, say, a TIFF file, or a 10-bit log ProRes frame, as it could to a raw image.
Myth: Raw Images Have No Native White Balance
One of the “magic” properties of a raw image is that it is said to have no inherent white balance. You get to “white balance after the fact.” This is one of the easiest demos of why raw is so great. It’s quite easy, for example, to shoot a daylight-balanced JPEG in tungsten lighting and demonstrate how nearly impossible it is to correct it to a properly white-balanced image. Capture the same shot raw, and the process of correcting the white balance is effortless.
But the reason this works is not that the raw image has no inherent, or native white balance. It does. The RGB color filters let in certain wavelengths of light, and these are chosen carefully by the manufacturer to result in a robust, but specific, colorimetry. There’s one and only one color of light that pings the red, green, and blue-filtered pixels to the same value, and that’s the native color temperature of a bayer-pattern sensor.
The reasons its hard to rescue a poorly-white-balanced 8-bit JPEG are numerous, and they compound on one another. An image shot at the wrong white balance will inevitably be very dark in one of the color channels — for example, our tungsten-lit, daylight-balanced JPEG will be so orange in appearance that the blue channel might be near-black. Fixing the image means brightening up the blue channel so much that we're going to not only experience nasty quantization from bringing up the deep shadows of the 8-bit image, but compression artifacts as well. Compression is perceptual, so when the compression engine sees a really dark blue channel, it assigns it very little of the available data values.
This is made much worse by the subjective tone and color adjustments that are baked into that JPEG. A pleasing contrast curve (or s-curve) makes a well-balanced JPEG look lovely. But part of how it does that is to create a "toe," or an area in the extreme shadows where values gradually taper off to pure black. Values in this range are quite similar, i.e. difficult to distinguish visually, and are therefore likely to be compressed heavily. When you brighten up that blue channel, you're trying to make useful, visible pixels out of this intentionally-mushed-down and mercilessly-compressed portion of the image.
Contrast curves and compression happen very late in the raw processing pipeline, but white balance happens quite early. The problem with trying to correct an improperly white balanced JPEG could be categorized as a colossal error in order of operations. So rescuing a poorly-white-balanced JPEG involves revealing the very worst of an image that was designed to be seen, but not touched.
When you adjust the white balance of a raw image, you're acting on the linear-light RGB pixels that resulted from the debayer phase. White balance is actually a very simple operation — it's nothing more than exposure adjustments in R, G and B. You’re doing this under a bunch of the other processing that goes into making a JPEG look nice, such as the s-curve and color adjustments.
So white balance is just exposure. Remember how easy exposure adjustments are in linear light? Remember also how easy they are in log?
A good log image is just as re-white-balanceable as a raw one.
I Don’t Believe You. It’s Frickin’ Magic
Not magic. But there is some really clever stuff going on in most raw processing software that can make it seem like raw images have magical properties.
Remember that white balance is just exposure adjustments per channel. For example, to warm up an image using white balance controls, you're increasing red exposure a lot, green a little, and decreasing blue.
When decreasing exposure, you can run into issues with highlights. A blown-out highlight, reduced in exposure, is not pretty.
An easy way to show off the power of raw is to use your raw processing software to reduce the exposure of a seemingly blown-out image. Often you'll see highlight detail appear as if by magic. Of course, it's not magic at all — it was there all along, but held in reserve. The reason for this is actually less about giving you room to reduce overall exposure in post, but rather for white balancing.