Two weeks ago, Vincent Laforet emailed me with a cryptic request to join him in shooting a follow-up to his short film Reverie, the short that started the avalanche of excitement over DSLRs that oh-by-the-way happen to shoot video. I was flattered, but found myself thinking “Does the world need another Reverie?” What I didn’t know was that Vincent had just had his mind blown by a new prototype camera, and his mind was racing with ideas for how to put it to work.
I met up with him in LA and saw the camera. Yes, the world needed to see what thing thing could do.
The camera was, of course, the Canon 1D Mark IV. It’s the first of Canon’s professional 1D line to feature HD video recording. The Mark IV joins the I-get-tired-just-typing-the-numbers crazy-high ISO club, maxing out at a ridiculous 102,400. This insane low-light capability extends to video recording as well. The 1D Mark IV is an HD camera that can see more in low light than your eye can, recording usable video at up to ISO 6400.
On our Friday night location scout, I took a break from giggling like a dork every time I pointed the camera down a dark street only to discover a supernova of illumination on the LCD, and asked the burning questions: Sensor? 1.3 crop. Aliasing? Still present. Autofocus? Not while recording.
So the Mark IV is an evolutionary step in the HDSLR race. It doesn’t tick too many things off my wish list. Where it is revolutionary is in its low-light performance. And it has by far the least rolling-shutter shear of any DSLR I’ve ever held.
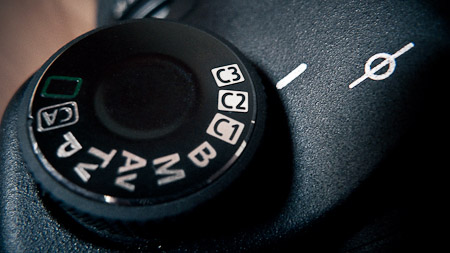
To hold it in your hand, you’d never know the 1D Mark IV has video. The body is exactly the same as that of its predecessor. After the 7D’s barrage of new buttons, including dedicated video start-stop, the Mark IV is a spare and spartan affair. My theory is that Canon doesn’t want to risk tripping up the muscle memory of its pro customers, many of whom still take this whole “photography” thing fairly seriously.
(For my part, owning a 5D Mark II and a 7D, operating the Mark IV pushed me into the schitzo zone. Now, no matter which Canon HDDSLR I pick up, I fumble with the controls and press the wrong thing.)
Two Nights, No Lights
Me hand-holding with a Zeiss prime (having donated my shoes to actor Mark Smith for the loading dock sequence), GripTrix driver Aaron Hummel, and Vincent with his ATM Gyro rig
Our mission was simple: We’d shoot for two nights in downtown LA, with whatever gear we could swing and no permits, and only with available light. We “lit” our scenes though careful location scouting and blocking. We shot in locations that were so dark that we could barely see. In fact, on our second night, a “real” film shoot moved in next to us under the 6th Street bridge, and they brought with them a massive truck with a crane-mounted stadium light array of nine HMIs to shoot the area we’d just left.
Let me state this clearly: This camera alleviates concerns over quantities of light. It’s still up to you to supply—or find—the quality of light.
Here are some notes in the experience:
- It’s one thing to shoot a film in two nights, but its another thing entirely to post it in a week. Editor Benjamin Nussbaum at Pictures in a Row is a total rock star. He took our hectic collection of footage and made it sing. If you need your shit cut good, go to Pictures in a Row. Seriously.
- I was all WTF? about the 1.3 crop, But Vincent reminded me that in the pro line, the 1D model has always been APS-H, while the 1Ds series is full-frame. Still, we wound up fiddling with prime lens choices more than we might with a more familiar sensor size.
- The reduced size of the sensor is considered in the stills world to be a worthwhile compromise in the name of faster frame rates. The equivalency in HD video might be sensor read-out times, because the rolling-shutter nastiness was so minimal that we did not shy away from Bourne-cam, whip-pans, and scrolling backgrounds.
- Speaking as someone who owns a 5D Mark II and a 7D, it’s that last point that makes me most envious of the Mark IV. Seeing in the dark is cool, but not worrying about Jello-cam is even better.
- Vincent and I collaborated with a third co-director, David Nelson. Sharing directing duties is hard, but if you put real effort into the collaboration it can be rewarding.
- We did color correct and lightly denoise the shots. When Reverie first hit, it was important to see “what the camera can do,” but now I think we’ve all matured a bit, and are interested in how a new camera fits into a reasonable post pipeline.
- You can color correct a three-minute short in one night using After Effects and Colorista. Sunrises are pretty.
The inevitable question: Should you buy the Mark IV? It’s gonna be expensive, and the APS-H sensor feels like a rest-stop on the way to a 1Ds Mark IV with full frame (and possibly a million other things we want, according to rather optimistic rumors). I’m happy with my 7D, and hold out hope for a firmware update for my 5D Mark II (UPDATE: Holy shit!). I’ll hold off on buying a Mark IV.
Until the next time I feel like making a movie in the dark.
Be sure to read Vincent’s post here. Like I have to tell you that.
Update 2009-10-20
John’s kind comment bellow reminded me of a point I wanted to make. He described the short as looking “gritty and filmic,” and I take that as a huge compliment. We achieved that in a number of ways, both creative and technical, but one simple technical rule helped in no small way: we limited ourselves to a 180 degree shutter. In other words, if we were shooting 24p, we used at least a 1/50 shutter—usually 1/60 to avoid flicker. When we shot 60p, we used a shutter of 1/125.
You may recall that my principal criticism of Reverie was that its wide-open shutter (impossible to override at the time) gave it the look of well-shot video.
Others have tried to use digital cinema cameras to capture the beauty of downtown Los Angeles at night, but they’ve always needed to open their electronic shutter past 180 virtual degrees, and the results are a dead giveaway of video origination. The 1D Mark IV gave us the low-light performance we needed to stick to our guns on the 180 degree maximum shutter rule.
Update 2009-10-21
Inexplicably, Canon has asked Vincent Laforet to remove Nocturne from his blog today. Vincent reminds us that “this happened last year [with Reverie] and all was fine a few days later.” So let’s hope that’s the case this time as well.
The SmugMug embed above worked for a while after the news but has finally died, it seems.


